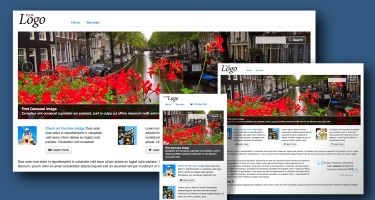
Create an Engaging Website with Twitter Bootstrap 2.x

About This Course
This step-by-step approach will show you how to build a responsive, interactive, and visually engaging web page with simple and flexible HTML, CSS and JavaScript — all built on the free, open-source framework called Twitter Bootstrap. Learn to take advantage of the many aspects of Twitter Bootsrtap, including creating your own layouts, customizing components, device-sensitive elements, auto-suggest form fields, and extend the icon sprite sheet to incorporate your own icons! This course includes HTML, CSS, JavaScript, and Photoshop templates that you can customize for use in your own projects.
What are the requirements?
- A text editor, Photoshop CS2 or later (optional)
What is the target audience?
- Graphic and Print Designers, Web Designers, Front-end Developers, Tech-savvy Marketing Managers
Course Staff

Chris Converse
Designer and Developer at Codify Design Studio
Chris has over 22 years experience in graphic design and interactive media, with a unique focus on both design and development. Chris possesses development skills across such languages as HTML, CSS, JavaScript (including jQuery and AngulatJS), and PHP, making his design execution optimal across various media. In addition to designing and teaching online, Chris speaks at number of industry-related conferences, including HOW Design, Adobe MAX, Adobe ADIM, AIGA, and the Creative Publishing Network.
Frequently Asked Questions
What web browser should I use?
The EnlightMe platform works best with current versions of Chrome, Firefox or Safari, or with Internet Explorer version 9 and above.
Course Features
- Lectures 24
- Quizzes 0
- Duration 4 Hours/Week
- Skill level
- Language English
- Students 594
- Certificate No
- Assessments Self
-
Section 1: Chapter 1: Getting Started
- Lecture 1.1 Lecture 1:Introduction Locked
- Lecture 1.2 Lecture 2:What is Twitter Bootstrap Locked
- Lecture 1.3 Lecture 3:About the Project Files Locked
- Lecture 1.4 Lecture 4:Project Files Locked
- Lecture 1.5 Lecture 5:Starting Your Project Locked
-
Section 2: Chapter 2: Adding the Base Markup for the Page
- Lecture 2.1 Lecture 6:Page Container and Nested Rows Locked
- Lecture 2.2 Lecture 7:Adding Containers for Content Locked
- Lecture 2.3 Lecture 8:Adding Main Content Locked
- Lecture 2.4 Lecture 9:Preparing Graphics with Photoshop Locked
-
Section 3: Chapter 3: Adding your Own Style with CSS
- Lecture 3.1 Lecture 10:Styling the Blockquote Locked
- Lecture 3.2 Lecture 11:Styling the Footer Locked
- Lecture 3.3 Lecture 12:Add Content and Style the Promos Locked
- Lecture 3.4 Lecture 13:Add Your Logo with a Link Locked
- Lecture 3.5 Lecture 14:Adding the Navigation Menu Locked
-
Section 4: Chapter 4: Create Your Own Icons
- Lecture 4.1 Lecture 15:Add a Custom Icon to Glyphicons Locked
- Lecture 4.2 Lecture 16:Customize Styles for the Menus Locked
- Lecture 4.3 Lecture 17:Page and Background Styles Locked
-
Section 5: Chapter 5: Customize the Experience with Plug-ins
- Lecture 5.1 Lecture 18:HTML Markup for the Carousel Plug-in Locked
- Lecture 5.2 Lecture 19:Responsive Download via CSS Locked
- Lecture 5.3 Lecture 20:Set the Timing for the Carousel Locked
- Lecture 5.4 Lecture 21:Remote Control the Carousel Locked
- Lecture 5.5 Lecture 22:Adding Form Elements Locked
- Lecture 5.6 Lecture 23:Creating an Auto Suggest Locked
-
Section 6: Chapter 6: Where To Go From Here
- Lecture 6.1 Lecture 24:Where To Go from Here Locked


